Showing posts with label coconut free. Show all posts

Tuesday, September 17, 2013

Grain free quinoa tortillas

So, it's been awhile, I know. Sorry about that. Someday I will have free time enough to blog again...or so they say ;) Right now, I'm soaking up every moment of mommyhood that I can (and trying to sleep when we're not running a hundred miles an hour). 

Life's pretty good. But I definitely miss my blogging buddies and having fun recipes to share. 

However, I have to take a minute to talk about my new favorite food. Hopefully my little guy will keep content long enough for me to do that.

My little helper in the kitchen.

 This recipe caught my eye a couple weeks ago. I added it to my growing list of to-try recipes. But then I had a friend who is on a medical elimination diet ask me about alternative flour tortillas. So I shared it with her. And the recipe made its way to the top of my list. I prefer to share recipes with people that I can say I've tried personally. 

The finished product. Tastier than they look, I promise!

Well, I made these tortillas. Wow! It's been quite awhile since I had flour tortillas, so I'm not going to be able to make a good comparison. And I eat corn occasionally, but I don't like it (and it doesn't like me...). These are definitely better than corn tortillas in my book. And they are leaps and bounds above other gluten free tortillas I've tried (the store-bought kind). The texture is wonderfully chewy, but tears easily like a real tortilla, and the flavor is mild, almost a non-flavor...

I have learned that there is an art to making tortillas. And I definitely don't know it yet. But give me a few more tries with this recipe and I'm sure I'll be better. 

Mmm. Real tacos...gluten free style.
Recipes by Brittany at Real Sustenance
 
I followed the recipe exactly (I used palm shortening, and no I didn't measure by weight), but I will add my two cents to the process, because I learned a bit as I made the tortillas.

- I used red quinoa, and just ground it up in my spice grinder. There were a few bigger pieces still, but nothing really detrimental to the tortillas. 
- I baked the quinoa flour for 2 hours and 45 minutes. I then kept the flour in the fridge for a few days until I was able to make the tortilla recipe.
 - This recipe made about a dozen tortillas, bigger than a corn tortilla but smaller than a medium flour tortilla. I am estimating on the amount, because I ate them as I made them...and I ate quite a few before I ran out of dough to cook ;)
- I used two sheets of waxed paper to roll the tortillas out, and no flour. The method that worked best for me was to roll the dough out, peel back the first paper, then flip the tortilla onto it and peel back the second paper (careful: the dough tears very easily!). I then flipped the tortilla onto my spatula, and turned it into the pan. It's not fail-proof, but it seemed the easiest way to keep the dough from tearing apart too much.
- I set my stove-top to about 7 1/2 out of 10 on the heat dial (the directions are a little vague on the temp). That seemed to work well.
- The longer these were in the pan, the crispier they got around the edges. Everything softened a bit as they cooled, but for softer shells, watch your clock especially closely. 
- These reheat wonderfully, and hold up so great for tacos!

Yum! 

Saturday, January 05, 2013

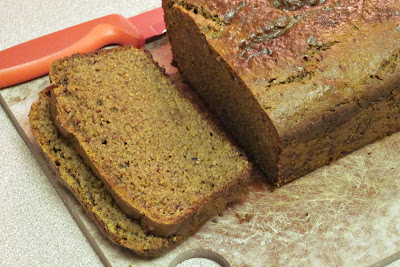
Amazing Cinnamon Bread - Paleo Style

I might be nesting, a little. Or just trying to alleviate my guilt at not having gotten much done over the past 3 weeks of "vacation" since I quit my job. One of the itches I've had as I've been sitting around the house, growing bigger, and becoming less productive, is baking. Partially to stock my freezer with food we can eat once our little coffee bean is here, and partially because I don't feel like I've done enough baking lately, and I really miss it.

This is my new favorite bread from The Paleo Parents. It's gluten free, and Paleo-friendly to boot! I haven't tried the bread pudding/French toast part of the recipe, but the cinnamon bread is awesome! I adapted the recipe by adding dates to the batter, instead of the raisins called for. The reason for this was that the Paleo Parents mention that this recipe is not overly sweet. The dates definitely helped with that!

This recipe is really great fresh from the oven, with some melted butter on top. 

Paleo Cinnamon Bread
Adapted from this recipe

2 c nut butter (almond butter is best, but it works great w/ Sunbutter* too!)
1 1/2 c blanched almond flour
4 large eggs
1/4 c maple syrup
1 tsp baking soda
1/2 tsp salt
2 tbsp cinnamon
1 tsp nutmeg
2/3 c soaked and pitted dates

Preheat oven to 350 degrees F.

Pulse all ingredients in a food processor until well combined. If batter is not smooth, add a bit of oil (this may happen, depending on the nut butter used).

Pour batter into a greased bread pan, and smooth the top.

Bake for about an hour. Bread should be golden brown, and a toothpick inserted will come out clean.

Cool on a rack in the pan for another hour. The bread will continue to cook a little bit more.

Slice, and serve, or use to make French Toast Casserole.

*Note: I tried this recipe with a combination of Sunbutter and almond butter, which worked just as well as the almond butter version. However, sunflower seed butter tends to turn green when combined with baking soda. So, eat same day, or don't freak out the next morning when you have greenish bread! It is harmless, and still tastes awesome!

Friday, September 28, 2012

Paleo Chocolate Mug Cake

I've seen the one-minute cake or microwave cake recipes floating around over the years. Before going GF, I even kept a box of chocolate cake mix on hand, with the exact measurements for a "single-serving" cake posted on my fridge. You know, just for that time of the month, and other emergencies which only chocolate could fix. But I never really gave the gluten free version a chance...

I got really excited earlier this year when I saw this Paleo Mug Cake recipe over at The Wannabe Chef's site. It was grain free, and had the option to be sugar free to! So I tried it out. I loved it! And then...I kept making it. Over and over and over again!


I've adapted this recipe a bit to suit my preferences. Honestly, I never measure the ingredients I'm adding, just eyeball it. I have added chia seeds to give it a little more texture, and for some extra fiber and Omega 3's. My favorite mix-ins are chocolate chips and/or nuts (walnuts or pecans work great). I also enjoy topping it off with a little something extra once it's made. Try an extra tablespoon of peanut/almond butter (let it melt on the hot cake). Or a dab of cashew cream. Or your favorite fruit preserves. However, it really is amazing just by itself.

Topped with extra chocolate chips and walnuts.

Give this little treat a try next time you have a craving for something rich and chocolatey! I promise, you will quickly become addicted as well.


Paleo Chocolate Mug Cake
Gluten free, dairy free, sugar free, grain free/Paleo, can be nut free

Serves 1

1 small, ripe banana
2 Tbsp nut/seed butter
1 egg
1 tsp vanilla
5-10 drops stevia, or 1-2 tsp agave (optional)
2 Tbsp cocoa powder (I like a mix of regular and dark cocoa)
1 Tbsp chia seeds
Mix-ins: 1-2 Tbsp chocolate chips, chopped nuts, dried fruit (optional)
Topping: 1 Tbsp nut butter, jam, whipped cream/cashew cream (optional)

In a small bowl, mash banana with a fork until it is smooth. Add nut butter, and mash again. Then add the egg, vanilla, and sweetener. Mix again until everything is well blended. Add cocoa and chia seeds, and mix very slowly (cocoa can be messy if you try and mix it too fast). Then stir in any mix-ins.

Pour batter into a microwave safe dish or mug. Do not over-fill the container, because this cake will rise in the microwave.

Microwave on high for 2 - 2 1/2 minutes, or until center of cake looks set.

Enjoy!

Cake can be eaten hot or cold. Or for breakfast. Or however you want it ;)

Topped w/ homemade Oregon blackberry-raspberry jam from my dad and step-mom! Amazing!

Sunday, September 23, 2012

Chocolate Chip "Milkshake" (Green Smoothie)

Yup, this is the latest and greatest of my green smoothie experiments. I've been on something of a cashew milk kick lately, and for some reason all that creamy goodness has me craving milkshakes! This baby boy LOVES his milkshakes!

The other day, I was craving a chocolate milkshake, and then once I created it, I realized that what I really wanted was chocolate chip ice cream! So I took the smoothie a bit further...

I've played with this one a bit over the past few days, and have really come to enjoy it. Of course, I added the avocado and spinach to justify it as a "healthy" treat ;)

As with most of my smoothies, the measurements are more of approximations. Taste test as you go, and you'll come up with results that work for you.

A great tip I wish someone would have told me awhile back is to experiment slowly w/ avocados in sweets. I absolutely love avocados, and obviously I love dessert, but I jumped in too fast with trying them out together, and had a few bad experiences before I figured out that I liked to add avocado slowly. Here's my rule of thumb: Start w/ half of the amount of avocado called for in a recipe (unless it's the centerpiece ingredient), then taste and add a little more if you like it, and then a little more...and compensate if it becomes too strong (add more chocolate, sweetener, etc). I really don't want to actually be able to *taste* the avocado in my smoothie, but it does add to the texture. Plus, it's a fantastic, healthy fat!

Anyway, back to the recipe!


Chocolate Chip "Milkshake" Green Smoothie
Gluten free, dairy free, coconut free, can be nut free
Makes about 2 c (1 large serving)

1 banana, cut into chunks and frozen
1-2 tbsp almond butter, or other nut/seed butter
1/2 c cashew milk, or milk of choice
1 1/2 - 2 tbsp cocoa powder
1/2 - 1 c raw spinach
1/4 - 1/2 avocado
Additional sweetener, to taste (I have enjoyed a couple drops vanilla stevia, and a dollop of molasses the most)
A couple ice cubes
1 tbsp dairy free chocolate chips (I use Enjoy Life)

Blend all ingredients except ice and chocolate chips in a high-powered blender, until smooth. Taste, add additional sweetener, liquid, cocoa, as desired.

Add ice and chocolate chips. Blend again, until ice is incorporated. Serve and enjoy!


Saturday, September 15, 2012

Newest Dairy Free Obsession - Cashew Milk

I've mentioned in previous posts that going dairy free was just as hard for me, if not more difficult, than going gluten free. I miss all the smooth, creamy sauces, melty cheeses, and rich ice creams of my past. Unlike the plethora of easily replaceable gluten free foods that taste just as good as the "original," there seem to be few products that legitimately work as dairy free substitutes.

One dairy replacement product that I truly loved was coconut milk. Coconut milk is a very versatile substitute for many dairy-based products, such as cream and milk. It can be used in savory recipes as well as sweet. The best dairy free ice cream I have ever had was made with coconut milk. I also loved this lemon cream coffee cake, and made it several times. However, sadly, I developed an intolerance to coconut...so that had to go too :(

I've experimented heavily with using nuts as dairy replacements - from my favorite almond milk, to cream cheese substitutes. I have found that nuts work exceptionally well in many forms to create a pretty good milk or soft cheese sub.

Lately, I've been on a nut milk kick. Blame it on being pregnant, where I am consuming way more refined carbs than I'd normally eat. The only thing that seems to appeal to me first thing in the morning is cereal. Thank goodness for GF Rice Krispies and the GF Chex line! When I am ill-prepared, I'll grab a box of store-bought almond milk out of the pantry, and choke that down w/ my cereal. However, nothing beats the consistency and flavor of freshly-made nut milk.

Enter cashew milk.


This has become my go-to recipe for surviving the mornings. It's incredibly rich, it's creamy, and it can be sweetened if you want to have a glass with your favorite gluten free cookies! It works fabulously in smoothies, milkshakes, and ice cream.

Even better, unlike the process of making almond milk, there is no straining involved with cashews! Just run your high-powered blender long enough, and it will get the job done quick and easy! Note: If you don't have a high-powered blender, I would recommend soaking your cashews for at least an hour before processing them, to make them softer.

You can alternate between the sweetener of your choice. I have tried Elana's recipe w/ agave nectar, Gena's vanilla-tinted variation w/ soaked dates, and I've even experimented with adding stevia or a bit of molasses for the calcium benefit. All have turned out great, but I think the agave nectar might be my favorite.

The "recipe" for cashew milk is really quite simple. Give it a try sometime, and you'll see why I love this creamy dairy free drink!


Cashew Milk
Gluten free, dairy free, coconut free, grain free/Paleo

1 c cashews, soaked at least 1 hour
4-5 c filtered water
Sweetener of choice (agave nectar or a few dates soaked for 20 min), to taste
A pinch of salt, if desired
A splash of vanilla extract, if desired

Rinse cashews well after soaking. Combine with other ingredients in a high-powered blender. Blend for 2 minutes on high. Taste, and add additional sweetener if desired.

Serve chilled, and stir well before use. Stores well for 3-5 days.

Notes:

*Most of the recipes I've seen recommend soaking your cashews for 1-8 hours, but I've skipped this step numerous times, and still had success.

*You can also thin the milk out a bit more with an extra 1/2-1 c water, if you'd like to get more bang for your buck.

*One great tip for that last-minute cashew milk craving: Throw a couple ice cubes in with your serving of milk and blend. This will chill the milk enough to pour over cereal.

Tuesday, August 28, 2012

Stuffed Zucchini

When I was a kid, my aunt came to visit, and she made us stuffed zucchini. The actual recipe is hazy in my mind now, but I remember this amazing squashy, meaty, cheesy goodness, with sweet bits of corn bursting through. We used to beg my mom to make it whenever we found a too-large zucchini in the garden. Which happened often at our place, thankfully :)

This is my latest makeover, inspired by nostalgia and this recipe by Sarah at Everyday Paleo. I kind of improvised, based on what I had around, and what I thought sounded good. So, here is a healthier version of stuffed zucchini.
Not the most appetizing picture, I know, but I was hungry!
Go to Sarah's link above for a more appealing representation. 

Stuffed Zucchini
Gluten free, dairy free, *mostly* grain free

Serves 4

2 large zucchini, halved
1 lb ground beef
1 tbsp onion powder
1/2 tbsp garlic powder
1 large tomato, diced
1/2-1 c corn (omit for grain-free/Paleo option)
1/2 c fresh basil, finely chopped
1/2 tbsp dried oregano
A splash of balsamic vinegar
Salt and black pepper
1/2 c spaghetti sauce (I added this to use up what I had, probably would be fine w/out)

Optional: Cheese/substitute to add on top (I sprinkled a little nooch-eez on half of my squash, and it was amazing!)


Preheat oven to 400 degrees F. Scoop the insides out of the zucchini, leaving enough flesh to be a sturdy bowl. Dice, then set aside flesh. Line a baking sheet with foil, then place the zucchinis, "bowl"-side up on the pan. Drizzle the insides of the bowls with olive oil, then bake for 15 minutes.

While the zucchini is baking, brown ground beef in a skillet with onion and garlic powder. When the meat is mostly cooked, add the diced zucchini flesh and tomato. Cook for about 5 minutes, then add remaining ingredients. Cook for 5-10 minutes more.

Once meat is cooked, and the shells are baked, fill the shells with the meat mixture. Stuff them with as much as they will hold. Sprinkle with cheese/substitute, if using. Then return the baking sheet to the oven, and bake for 20 minutes.

Enjoy!


And yes, it does kind of look like a lot to eat on your plate, but when you figure it's a meal-in-a-boat (meat and veggies all in one), it's not that much food. It is quite filling, and for some, may be enough. However, I was debating seconds just after having licked my fork clean. I settled for a brownie instead ;)


Friday, August 17, 2012

Favorite Summer Salad

Due to my current condition, gardening has not exactly been at the top of my priority list these days. Thankfully, I have an amazing husband!! A few months back, I dragged him to the Home Depot, and we picked out a handful of veggie and herb plants. He has labored over the garden this summer with diligence that I envy. And it has paid off. I swear I've never seen our garden look so good! So that's what happens when you actually water every day...lol.

Well, everything's growing nicely. The only problem is, I haven't been cooking as much. My herbs especially are exploding, and I am struggling to keep up with the weekly haul.

This salad has been a staple, since it is so fresh, easy, and doesn't require any heat! I must admit, this is one of very few ways that I actually enjoy cucumbers.

I adapted from this recipe over at The Food Lover's Kitchen, which is also in their fantastic cookbook. If you click on the photos on the recipe page, the salad is actually the second one that shows up, and it's gorgeous!

Because I'm a little OCD with my food, I measure out exactly equal parts tomatoes, cucumbers and olives, so I can have a bit of each in every bite, but you can do whatever you would like :)

Cucumber and Tomato Salad
Serves 1

1/2 cup each kalamata olive halves, cucumber chunks, and grape tomato halves
A handful of fresh basil, chopped thinly
1 tbsp extra virgin olive oil
1/2-1 tbsp balsamic vinegar
A couple shakes of salt
Freshly ground black pepper
A dash of garlic and onion powder

Combine all ingredients in a bowl, and mix well. Serve, and enjoy!

This salad keeps for a few hours, but isn't quite as good the next day, so I make just enough to eat.


Anyone else experiencing an abundance of herbs? How about those zucchini? Get ready for that saga...coming soon ;)

Monday, April 23, 2012

Hint of Chocolate Green Smoothie - GF/DF/SF

So, here's a quick fun little recipe for your enjoyment this evening.

I LOVE green smoothies. This just so happens to be my new favorite smoothie. It also has one of my new favorite foods in it.


Raw cocoa/cacao butter! I love this stuff! I especially love scraping the extra oil up after I melt it for my smoothie, and rubbing it all over my hands. P.S. I bought my cocoa butter on amazon. It was about $15 for a pound.

The smoothie is pretty simple to make. It's also quite versatile, so play with it. I decided to use cocoa butter since I'm trying to consume more fats, and can't have coconut. I had just bought the cocoa butter because I really want to try making my own lotion or body butter. Yes, this makes me a little bit hippie (we don't use the H-word in our house...all sorts of jokes generally follow - mostly my husband's doing).

Anyway, back to the recipe. Give it a try, adjusted to your tastes.

Hint of Chocolate Green Smoothie 
Gluten, dairy and sugar free

Makes 1 serving

1/2 - 1 banana
1/2 - 3/4 c almond milk or milk of your choice
a handful or two raw spinach
2 tbsp cocoa butter, melted
1 tbsp chia seeds
1 - 2 tbsp almond butter or handful of nuts
1/3 c crushed ice
a splash of vanilla
a couple drops of stevia (optional)
1 - 2 tbsp cocoa/cacao powder (optional, but makes the chocolate flavor more potent)

Add all ingredients except the ice to your blender. Blend on high until smooth, about a minute or two. Taste, and adjust accordingly. Add ice, and blend again.

Serve and enjoy!


Note: I have made this several times while on a sugar free diet. The only sugar I'm allowed is one serving of green banana a day. So, while I think this is good and very sweet just the way it is, you may feel the need for additional sweetener. Add away!

Tuesday, November 22, 2011

Thanksgiving Menu 2011

I'm rather embarrassed that it has been 2 months since I last posted. Life has been incredibly busy and stressful, but mostly good. However, I have not had much time to keep up the blog.

So, Thanksgiving is just about here, and I'm sure most of you have your menus all planned. However, if you are in need of any last-minute inspiration, here is my plan for the big dinner.

Well, technically, we are having 2 Thanksgiving dinners. Wednesday night, we're having a smaller feast, with just the two of us. On Thursday, we're headed to Grandma's house to celebrate w/ the in-laws. They should have some safe foods for me, but I always like to be prepared, just in case. So I'm sure I'll have a Tupperware or two of leftovers hanging out in my purse.

As far as my meal plan goes, this is the rundown:

For the bird - I have my brine soaking my 12-pound free-range turkey right now, a delicious-smelling concoction from Pioneer Woman (also, check out her tips on controlling saltiness post-brine). I plan on following this recipe to actually cook the turkey tomorrow.

I LOVED this cranberry citrus sauce last year, so I am making it again. But I am struggling to resist the gorgeous photos of this tart recipe, so I think I'm going to halve the first recipe, and make a half-batch of The Food Lovers primal cranberry sauce too! Funny that I never touched this stuff as a kid, and now I can't get enough cranberry sauce!

Rolls - I had planned on making Carol's beautiful GF/DF dinner rolls...but laziness struck, and I hit up the health food store to see if I could find any rolls from my new favorite local bakery! Success! They are a bit pricey, and not at all paleo (but still GF of course), but after my first bite, I decided they're definitely worth the cost! Hopefully I will have the self-control to save the rest for dinner tomorrow.

Since we're on a pretty paleo diet these days, I thought I'd skip the stuffing this year, since I'm the only one who likes it anyway. Hopefully the rolls will be enough to give us our carb-fix (and I'm sure my husband will get his fill of mashed potatoes on Thursday).

Another favorite recipe from last year - Irvin's GF/VEGAN green bean casserole. I've been having dreams about this dish, and can't wait to taste it again! I'm trying an onion-free experiment to see how my body does without them, so I wanted a substitute for the absolutely divine shallot crisps in this recipe. I think I'm going to give this almond "bread crumb" topping a go.

I don't ever remember eating butter pecan sweet potatoes, but someone mentioned them in a blog post the other day, and I started fantasizing. So I did some searching, and came upon this recipe. Knowing Martha, she won't disappoint.

We're bringing a couple appetizers to the big dinner on Thursday. I've got a veggie platter in the works, as well as my favorite cheezy dip from Kristen's Raw. I'm also contemplating baking some bacon-wrapped dates. I wonder how many of those would still be on the plate when we get to Grandma's...

On to desserts.

I keep coming back to this paleo pumpkin pie recipe. I love that it looks like a creamy, fluffy pumpkin filling, but there's no coconut in it! I'm sold! For those who can tolerate coconut, I suggest this chocolate mousse pie which has me salivating. As far as my own chocolate fix goes, I'm also planning on making my chocolate pecan tart recipe again, but I'm wanting to paleoize it if I can. We'll see how that goes.

There are so many great resources out there for paleo/gluten-free/dairy-free and other allergy-friendly recipes, if you can find them! I hope some of the recipes I've listed have inspired you! I can't wait to hear how everyone's meal goes :)

Have a happy and safe Thanksgiving all!

Sunday, September 18, 2011

Banana Nut Muffins - Paleo Style!

Funny story: My husband said to me on Tuesday night, "Did you know that it was National Celiac Awareness Day today?" I responded that I was aware, and asked him if he knew that. He said he did now, and I asked how he found out. He said he read it on Failbook, which is a website dedicated to sharing people's failures (it's rather hilarious, but can be crude). His statement cracked me up for some reason. We rely on social media to keep up to date on our friends' birthdays, the news, pretty much everything!

Anyway, things are going pretty well these days. Extremely busy, but it is what it is. Luke's writing up a storm, trying to get applications and essays in to 7 business programs, as well as working full-time and juggling a full load at school. Work is keeping me on my feet as well. I feel like when I'm at home, I do nothing but cook and wash dishes thanks to our paleo lifestyle, but other than that, the diet is going great! Been working out more too, which has been fun! Plus, the sun is back, for the next few days at least, and that makes me happy :)

I wanted to share a recipe that has literally saved me since my husband joined me in this paleo venture. I don't seem to have a hard time finding things to eat...but I really enjoy vegetables. Unlike my husband, whose repertoire of favorable veggies is rather sparse. So, in attempts to keep him fed, and from getting burned out on salads, chicken with (fill in the veggie blank), and bunless burgers, I have tried to find filling, satisfying snacks for him to enjoy. 

This recipe is gold.

We both love banana bread, and I really appreciate that this form of said food can be enjoyed without all the non-paleo ingredients, such as sugar, wheat, etc. It's an easy recipe to make, makes a lot, and the muffins are delicious when warmed with a bit of melted butter on top. 


Paleo Banana Nut Muffins
Adapted from the recipe in "The Gluten Free Almond Flour Cookbook" by Elana Amsterdam

3 c blanched almond flour
1/4 tsp salt
1 1/2 tsp baking soda
2 tbsp olive oil
3 large eggs
4-5 very ripe bananas
1 c chopped walnuts

Preheat oven to 350 degrees F. Line 12-18 muffin cups with liners.

Put the bananas into a bowl. Using a hand mixer, mash up the bananas. Add the oil and eggs, and blend until the mixture is smooth. Add the flour, salt and soda. Mix well. Add the walnuts, and combine. 

Spoon the batter into the muffin cups. Bake for 35 minutes, or until the muffins are golden brown. Check with a toothpick if desired. Let muffins cool in the pan for about half an hour, then serve.

*Note: The original recipe says that this recipe makes a dozen muffins. I don't know if I just have a small muffin pan, but I've gotten 15-18 muffins every time I've made it. 

These muffins freeze well, and travel well. They are great warm, but are just as good at room temperature. 

Enjoy!

Thursday, September 08, 2011

My New Favorite Chicken

Sorry I haven't posted a lot lately. Cooking paleo-style for two is much harder than I'd anticipated. I feel like I'm running the dishwasher every night, and I've made 3 trips to various grocery stores (2x to COSTCO!!) in the last 2 weeks. Sheesh! But, if nothing else, my husband has been well-fed.

I've been trying to come up with delicious and easy recipes that we both enjoy. It's been a challenge, but I'm persistent. Chicken is something that we often tire of, as we eat it frequently, and I usually make it one of two or three boring ways. Well, no more! The funny thing is, I was going to post a different chicken recipe that I found, and liked...but it has been sent to the back burner tonight. I've also got a couple more treat recipes to share soon.

I was a bit skeptical of this recipe at Everyday Paleo at first. Yes, easy and amazing are both words in the title. But I was still apprehensive. Could it really be that easy? Plus, as I've mentioned before, I have this squeamishly irrational fear of bones, skins and tendons in meat. Yes, it's cheaper to buy those cuts. But it's also grosssssss!

However, in the name of all things paleo, I was determined to try this recipe. With my beautiful, new 5 lb organic, free-range bird. I knew I had to do something great with it!

So worth it! And it really is that simple. 3 ingredients. 1 hour. Incredible results! I really did not stop talking about this chicken at dinner. I am pretty sure I ate a whole pound of meat tonight. It was amazing! I'm already planning my next trip to costco, where I can grab two birds at once for a better price! Seriously, this recipe is a must-try!


Easy and Amazing Roast Chicken
(adapted from this recipe at Everyday Paleo)

1 4-5 lb chicken
salt (I am gonna guess and say I used almost a tbsp)
1 tbsp butter, if desired

Preheat oven to 450 degrees F. Rinse and dry the chicken w/ paper towels. Place, breast down, in a roasting pan (I just used a 9x13 glass baking dish). Sprinkle with salt all over the outside and inside. Smear the butter around the surface of the bird as well. Bake for 1 hour (mine was just right after exactly 1 hour). Chicken is done when the outside is golden and crispy. I didn't even cut into mine to check it. I just pulled it out of the oven, and let it sit for 15 minutes, then carved. It was perfect! Very tender and juicy on the inside.

Also, the drippings were to-die-for! The flavor reminded me of KFC dinners from my childhood. I think it was the butter :) I kept taking a spoon to the baking dish, and drizzling more juice over my chicken. I was literally tempted to get out a straw...lol.

I am planning on saving the bones, and any leftover drippings, and making stock as soon as we've eaten all the meat off the bird. I bet the flavor is going to be delicious!

The oven did get a bit splattered, just for the record. I don't really mind, it was already dirty. But if you care about the inside of your oven, this may be something you want to be aware of prior to making this recipe.

Hope you will try this soon! Let me know how much you love it too!

Thursday, August 11, 2011

Paleo update and this week's favorite links

No recipe post tonight, just saying hi, and spreading the blogworld love. I will, however, share what I ate for dinner, because it rocked!

Scrumptious Slow Cooker Chicken...and indeed it was! I followed the recipe as posted by Sarah, only I subbed 2 large chicken breasts for the thighs. Oh, and olive oil for the coconut. It was amazing! And my husband liked it too! I picked the onions out of his, of course ;) Next time, I am adding TWICE as many carrots and parsnips though. I seriously felt like I was cheating and eating real potatoes. An awesome dinner to come home to after a long day at work. Ate it w/ some salad fixin's fresh from my garden. Yum!

If you want to know details on what I've been up to over the past week as far as my 30 day paleo challenge goes, head over to Wellness Mama's forum, where I've started a wellness journal. I'm posting my food log, thoughts, plans, workouts, etc. I'm having loads of fun exploring her site, and am excited about some great giveaways too!

You can't fix a body you hate: This is the post I wish I could send to my past self (anytime 2-6 years ago), and to all my beautiful friends who don't feel comfortable in their own skin. Thanks Sarah and Jason for sharing it! It makes me appreciate who I am today even more, flaws and all! Thanks also to my amazing, supportive husband who has always praised my body, even when I felt I was at my worst. Jason has some great points to make. I'm excited to read more from him on his blog, plus he's already super cool in my book, being a fellow Oregonian (can I still count myself as one, even though the last third of my life has been lived in Utah?). Anyway, read the post!

Need more motivation to go paleo/grain-free/eat bacon? Primal Toad's got you covered with his 11 tips to living an awesome life. It really is an awesome way to live your life. I agree wholeheartedly with this post, but my favorite tips would have to be #2 and #9 ;)

Speaking of the good life, the hubby and I are taking the day off tomorrow for some R&R. He's taking the GMAT on Saturday, and we're using tomorrow to charge the batteries. I'm so excited! Massages, movies, lunch, and hopefully some time in the sun. I'm even more excited to have the whole thing behind us, and finally see my husband again (I feel like it's been months!!). Maybe we'll even get to go on a hike together before the summer is over!

Me and Grok on top of the world.

It's taken me almost a year, but I'm finally living this paleo/primal life...
and I LOVE IT!

Week three has been a tough one, in ways other than the diet mostly, but I have had some discouraging days where I'm unprepared to eat. I've found that I'm eating more at the beginning of the day, and not as hungry in the evenings, which helps. I've made some incredible food, which I'm so excited to share (at a later date). Well, it's almost 9:00...which means bedtime (for two more nights)!

Later!

Saturday, August 06, 2011

Banana "Ice Cream" Variations

Remember this post? I don't know whether to thank or curse my friend for turning me onto 1-ingredient ice cream! It has been a serendipitous, healthy treat to have on hand as I've transitioned onto the paleo diet.

I have been playing with this dessert over the past couple of weeks, and have come up with some great variations.

This one has been my favorite so far.


Chocolate Cherry Banana "Ice Cream"
(Cherries Garcia, anyone?)

1 1/2 frozen banana pieces
1 tbsp cocoa powder
A handful of cherries, halved and pits removed
1-2 squares dark chocolate, grated/chopped

Put the banana pieces in blender or food processor. Blend until the banana becomes thick, like ice cream. Scrape down the sides as needed.
Add cocoa powder, and continue blending.
Add cherries and chocolate, and pulse a few times to blend, and chop the cherries.
Scoop into a bowl. Either enjoy right away, or put in the freezer to firm up for a bit.


One of these days, I will take the time to use my food processor to make this recipe, which I think will make this look more ice-creamy.

Avocado Goodness "Recipe"

I mentioned this fantastic recipe in this post, and figured I'd share my favorite way to enjoy it. It's so easy, it really doesn't even need a recipe!

Sarah at Everyday Paleo created this little delight and I love her for it! It makes a great post workout snack or a fantastic side to most dishes where you want to add some delicious fat.


Avocado Goodness
Recipe adapted from Sarah at Everyday Paleo

1 avocado, halved, w/ pit removed
1 1/2 tbsp olive oil
1 1/2 tbsp balsamic vinegar
A pinch each garlic powder and salt
A sprinkle black pepper

Arrange your avocado halves on a plate. Either whisk together the remaining ingredients and drizzle over the avocado, or just pour on top of the avocado, and enjoy.

Paleo Bacon, Lettuce, Tomato & Avocado "Sandwich" - 2 ways


Ok, it's recipe time!

I have always been a fan of the BLTA/turkey club sandwich combo, so I had to try both of the paleo recipes I came across. I couldn't decide which variation of my paleo club sandwich I liked better, so I will share both with you!


First up, we have the Portobello Sandwich. This sandwich was inspired by Sarah @ Everyday Paleo's Chicken Sandwich (doesn't that look delicious?!).

Paleo Turkey BLTA Sandwich #1

2 portobello mushrooms, wiped clean, stems removed
A few slices quality turkey lunch meat
1 avocado, peeled and sliced
A handful spinach or lettuce
Half a tomato, thinly sliced
2-3 pieces bacon, cooked
1 tbsp mayo (I know there are some paleo recipes out there, but I haven't delved that deeply into the lifestyle yet. Still using up the ol' Best Foods)

Heat some olive oil in a large skillet, and add mushrooms, cap side up. Cook for about 5 minutes, then flip and cook 5 minutes more. The tops will turn a golden brownish color. Remove from pan.
My mushrooms decided to sweat, and so I put them on a plate w/ paper towels to soak up the excess liquid for a couple minutes.
Spread the mayo on underside of the mushrooms. Pile the remaining ingredients on top of one of the mushrooms, then top w/ the other.
Enjoy, and try not to freak out!


The next variation of my sandwich comes from Mark Sisson's cookbook, Primal Blueprint Quick & Easy Meals. This was the first recipe I bookmarked when flipping through the book. Great foresight!


Paleo Chicken BLTA Sandwich #2

1 chicken breast (1/4-1/3 of the top cut off)
1 tbsp mayo
2 slices bacon, cooked
A handful of arugula or spinach
Half a tomato, thinly sliced
1 avocado, peeled and sliced

Butterfly the chicken breast (cut lengthwise through it so it can be opened up like a book).
Heat a little butter in a pan, and cook the chicken, opened up, for 4-6 minutes, or until browned. Flip chicken over and cook, covered, for an additional 5-10 minutes (depending on the thickness). Don't overcook the chicken, or it will be dry!
Remove from pan, and spread the mayo on the inside. Add the rest of the ingredients, and "close" the chicken breast. Dig in, and revel!

Notes: The original recipe called for a whole chicken breast, but I had a larger-sized piece of meat, so I decided to trim it a bit. I probably cut of about 1/4 of the breast, and may even take off more next time. Keep an eye on your cooking times if reducing the meat.
This one was pretty messy, and the hinge broke, so everything slid out a few times. No biggie. It was good and messy fun!
The cookbook suggests eating either warm or cold. I have only had this warm, but I bet it would make an amazing lunch and plan on trying it cold soon!
This sandwich was much more filling, thanks to the massive amounts of protein, I'm sure. I didn't eat anything else for the rest of the day (5-6 hours).

*

I ended up with less than half of an avocado leftover w/ both of these recipes, not really enough to save. So I made some Avocado Goodness to go along with each sandwich. I would highly suggest you do the same. You won't regret it!!

*

Also, if for some reason you need any encouragement to enjoy either of these sandwiches, head over to Primal Toad's blog for 5 Reasons Why Loving Bacon May Be The Healthiest Thing In The World ;) Then you can enjoy your bacon without feeling guilty!

Sunday, July 10, 2011

Strawberry Shortcake


I love strawberries! I like to eat them plain, throw them in my smoothies, enjoy in a bowl of cereal, or add to some creamy and/or chocolate-y dessert.

I know I'm a little behind strawberry season with this post, but I had a carton of gorgeous red berries in my fridge, and wanted to do something spectacular with them. I dehydrated several pints of strawberries last month, and they were fantastic, but a lot of work for a treat that only lasted me a few days. I figured I ought to do something a little easier with this bunch of berries.

I jumped online, and drooled over a few recipes that I've been dying to try...


In the end, I decided on a strawberry shortcake. I followed recipes from Elana's cookbook, The Gluten Free Almond Flour Cookbook, substituting out the whipped cream called for in her recipe.


First, I made the drop biscuits, similar this recipe, which calls for butter instead of oil.

Then I made her vegan Creme Patissiere (pastry cream - here's a great non-vegan recipe and video) recipe, which uses cashews. YUM!

I then layered the creme and berries in a biscuit sandwich. And there you have it!

Strawberry Shortcake
Recipe adapted from The Gluten Free Almond Flour Cookbook

1 batch pre-made drop biscuits (see recipe, below)
1 batch creme patissiere (see recipe, below)
1 pint fresh strawberries

Clean, hull and slice the strawberries.
Cut the tops off of the biscuits.
Arrange biscuits on individual serving plates.

Note: Elana's original shortcake recipe called for 4 cups whipped cream. I managed to get 2 cups of the creme patissiere, but didn't double the recipe.


Classic Drop Biscuits
Recipe adapted from The Gluten Free Almond Flour Cookbook
(makes 8-10)

2 ½ c blanched almond flour
½ tsp sea salt
½ tsp baking soda
¼ c olive oil
1/4 c agave nectar
2 eggs
1 tsp lemon juice

In a large bowl, mix together oil, agave, eggs and lemon juice. Add the dry ingredients on top, and mix together until thoroughly combined.
Preheat your oven to 350 degrees F. Line a large baking sheet w/ parchment paper or oiled foil.
Scoop the batter onto the baking sheet, about 1/4 c per biscuit, and situate them about 2 inches apart. I managed to get 10 from my batch.
Bake for 15 minutes, until biscuits are golden brown. Check w/ a toothpick, if desired. Cool briefly on the baking sheet, then remove to a wire rack and let cool.

Creme Patissiere
Recipe adapted from The Gluten Free Almond Flour Cookbook
(makes 1 1/2 - 2 c)

1 c raw cashews
1/2 c milk/substitute of choice (original recipe called for all water.I needed to use up some almond milk)
1/2 c plus 1 tbsp water
1/3 c agave nectar
1 tbsp vanilla extract
1 tbsp arrowroot powder

Combine cashews, milk, 1/2 c water, agave and vanilla in a blender. Puree on high for 1-2 minutes, until mixture is smooth.
Pour into a medium saucepan, and bring to a boil over medium heat, stirring frequently.
While it is heating, mix together the arrowroot and remaining 1 tbsp water in a small bowl. Stir to create a paste. Keep nearby.
Once the cashew mixture boiling, whisk constantly for 1 minute. Increase the heat to high, and mix in the arrowroot paste. Whisk constantly for another minute, until the mixture starts to thicken. Remove from heat, and let cool for a few minutes. Transfer to a glass jar, and cool completely.
Will keep, refrigerated, for 2 days.