Tuesday, September 17, 2013

Grain free quinoa tortillas

So, it's been awhile, I know. Sorry about that. Someday I will have free time enough to blog again...or so they say ;) Right now, I'm soaking up every moment of mommyhood that I can (and trying to sleep when we're not running a hundred miles an hour). 

Life's pretty good. But I definitely miss my blogging buddies and having fun recipes to share. 

However, I have to take a minute to talk about my new favorite food. Hopefully my little guy will keep content long enough for me to do that.

My little helper in the kitchen.

 This recipe caught my eye a couple weeks ago. I added it to my growing list of to-try recipes. But then I had a friend who is on a medical elimination diet ask me about alternative flour tortillas. So I shared it with her. And the recipe made its way to the top of my list. I prefer to share recipes with people that I can say I've tried personally. 

The finished product. Tastier than they look, I promise!

Well, I made these tortillas. Wow! It's been quite awhile since I had flour tortillas, so I'm not going to be able to make a good comparison. And I eat corn occasionally, but I don't like it (and it doesn't like me...). These are definitely better than corn tortillas in my book. And they are leaps and bounds above other gluten free tortillas I've tried (the store-bought kind). The texture is wonderfully chewy, but tears easily like a real tortilla, and the flavor is mild, almost a non-flavor...

I have learned that there is an art to making tortillas. And I definitely don't know it yet. But give me a few more tries with this recipe and I'm sure I'll be better. 

Mmm. Real tacos...gluten free style.
Recipes by Brittany at Real Sustenance
 
I followed the recipe exactly (I used palm shortening, and no I didn't measure by weight), but I will add my two cents to the process, because I learned a bit as I made the tortillas.

- I used red quinoa, and just ground it up in my spice grinder. There were a few bigger pieces still, but nothing really detrimental to the tortillas. 
- I baked the quinoa flour for 2 hours and 45 minutes. I then kept the flour in the fridge for a few days until I was able to make the tortilla recipe.
 - This recipe made about a dozen tortillas, bigger than a corn tortilla but smaller than a medium flour tortilla. I am estimating on the amount, because I ate them as I made them...and I ate quite a few before I ran out of dough to cook ;)
- I used two sheets of waxed paper to roll the tortillas out, and no flour. The method that worked best for me was to roll the dough out, peel back the first paper, then flip the tortilla onto it and peel back the second paper (careful: the dough tears very easily!). I then flipped the tortilla onto my spatula, and turned it into the pan. It's not fail-proof, but it seemed the easiest way to keep the dough from tearing apart too much.
- I set my stove-top to about 7 1/2 out of 10 on the heat dial (the directions are a little vague on the temp). That seemed to work well.
- The longer these were in the pan, the crispier they got around the edges. Everything softened a bit as they cooled, but for softer shells, watch your clock especially closely. 
- These reheat wonderfully, and hold up so great for tacos!

Yum! 

Sunday, April 07, 2013

This is my life now...


Yep, my life has been officially taken over by this sweet little boy! I will (hopefully) be back soon!

Saturday, January 05, 2013

Amazing Cinnamon Bread - Paleo Style

I might be nesting, a little. Or just trying to alleviate my guilt at not having gotten much done over the past 3 weeks of "vacation" since I quit my job. One of the itches I've had as I've been sitting around the house, growing bigger, and becoming less productive, is baking. Partially to stock my freezer with food we can eat once our little coffee bean is here, and partially because I don't feel like I've done enough baking lately, and I really miss it.

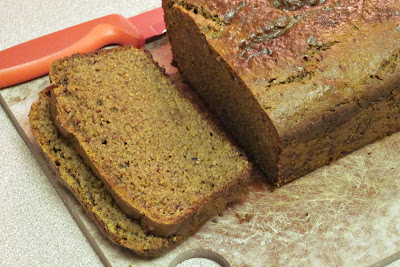
This is my new favorite bread from The Paleo Parents. It's gluten free, and Paleo-friendly to boot! I haven't tried the bread pudding/French toast part of the recipe, but the cinnamon bread is awesome! I adapted the recipe by adding dates to the batter, instead of the raisins called for. The reason for this was that the Paleo Parents mention that this recipe is not overly sweet. The dates definitely helped with that!

This recipe is really great fresh from the oven, with some melted butter on top. 

Paleo Cinnamon Bread
Adapted from this recipe

2 c nut butter (almond butter is best, but it works great w/ Sunbutter* too!)
1 1/2 c blanched almond flour
4 large eggs
1/4 c maple syrup
1 tsp baking soda
1/2 tsp salt
2 tbsp cinnamon
1 tsp nutmeg
2/3 c soaked and pitted dates

Preheat oven to 350 degrees F.

Pulse all ingredients in a food processor until well combined. If batter is not smooth, add a bit of oil (this may happen, depending on the nut butter used).

Pour batter into a greased bread pan, and smooth the top.

Bake for about an hour. Bread should be golden brown, and a toothpick inserted will come out clean.

Cool on a rack in the pan for another hour. The bread will continue to cook a little bit more.

Slice, and serve, or use to make French Toast Casserole.

*Note: I tried this recipe with a combination of Sunbutter and almond butter, which worked just as well as the almond butter version. However, sunflower seed butter tends to turn green when combined with baking soda. So, eat same day, or don't freak out the next morning when you have greenish bread! It is harmless, and still tastes awesome!

Thursday, December 20, 2012

Fave Pregnancy Drink

I've always enjoyed a hot cup of herbal tea when I've been sick, or to help de-stress. However, drinking tea while pregnant has been a challenge for me.

Before we tried to get pregnant, I was chugging red raspberry leaf tea, as I'd read that it is a uterine tonic, as well as a fertility booster. I don't know if I can chock up my quick success to the tea, but it sure didn't hurt our chances! I determined to continue drinking the tea throughout my pregnancy.

Red raspberry leaf tea consumption is widely recommended by midwives and natural health promoters to help during pregnancy, especially the last trimester, when the body is getting ready to evict that cute little baby.

During my first trimester, I went through a lemonade kick. One day it occurred to me that I could mix my RRL tea and lemonade, to create an awesome iced tea. It worked! I just brewed a few cups of tea, then subbed that in for some of the water when making the lemonade. It was delicious.

Currently, my favorite way to enjoy RRL is an iced tea brewed with Tazo Passion herbal tea, which has a wonderful, slightly tart and fruity flavor. I'll brew the two together, then mix in some honey, allow to cool, then add in some fresh-squeezed lemon or orange, and enjoy over ice.


If you want more information on the benefits of red raspberry leaf tea, check out this great blog post.

Friday, November 16, 2012

Turkey Day Game Plan 2012

Thanksgiving is just around the corner. Seems everyone right now is sharing their awesome recipes on the blogs, which offers an overwhelming array of delicious foods to choose from.

This year, things are going to be simplified in our house. We'll probably visit the in-laws for the usual feast, which means I will need to be stocked with some safe dining options. I'm cool with that, I love Thanksgiving food (and especially leftovers)!

However, due to the increasing size of my belly, and the strain on my poor muscles, I am not allowed to spend as much time on my feet. This has severely cramped my ability to cook lately (and do dishes, darn...).

So, this is my plan for the big day:

The Amazing Feast of 2011 
The bird: I have a 10 lb free-range turkey on its way, which I ordered from my favorite Sprouts Farmer's Market. I plan on keeping it simple, and following this winning recipe from allrecipes.com.

The sides: My favorite green bean casserole for the past few years - Thanks to Irvin at Eat the Love for allowing me to enjoy this classic dish without all the gluten and dairy! (pictured above)

Still debating between these two recipes - Roasted Orange Sweet Potatoes from Gluten Free Girl & The Chef - or Cinnamon Stuffed Sweet Potatoes (I know it's a recipe from a yogurt website, but I plan on subbing cashew cream in for the yogurt). 

Of course, I'll be whipping up a batch of Cranberry Citrus Sauce from Kim at Cook it Allergy Free! I can't get enough of this stuff. I've been dreaming about it for months now, as the weather's hinted at getting colder ;) (pictured above)
If I have any leftover sauce, I may try adding some of it to this gorgeous cake recipe from Iris at the Daily Dietribe. 

Dessert: Of course, it wouldn't be Thanksgiving without something amazing to satisfy the sweet tooth! I'm sticking to my tried and true (and much loved) Chocolate Pecan Tart. I think I'm going grain free on the crust this year (I love the Food Lovers' almond flour crust!), and will somehow be adapting the filling (possibly using Hallie's pecan tart as a guide?). 

I promise to follow up this year with the results of all this hard work!

What do you all have planned this year?


*The photo above is from last year's dinner, however, I never posted a follow up on how everything turned out! It was great! The turkey was deliciously flavored, and I definitely enjoyed all my leftovers :)

Sunday, October 28, 2012

A Proud Sister

I know I have not been following the most Paleo diet of late (although I really have improved things as I've progressed through my second trimester and into the third). However, I am still a firm believer. Over the past couple years, my younger brother has dabbled with different diets to see what helps him feel best. We've talked a lot about the different things we've tried, and what bothers us and how. It's kind of a common topic among certain of my family members :)

I'm pretty sure he's Celiac, as well as intolerant to a few other foods. He and I have talked Paleo for awhile, and I know he's been giving it a try this last summer/fall.

He made this post on facebook a couple days ago, and I just beamed. I'm so happy he's found something that works for him, and that he's feeling so much better! Extra proud because he's a barista at Starbucks! I would not have the discipline to work there and not partake of all that goodness ;)

So happy for him! P.S. I think he meant to write "Have to write a testimonial."

Friday, September 28, 2012

Paleo Chocolate Mug Cake

I've seen the one-minute cake or microwave cake recipes floating around over the years. Before going GF, I even kept a box of chocolate cake mix on hand, with the exact measurements for a "single-serving" cake posted on my fridge. You know, just for that time of the month, and other emergencies which only chocolate could fix. But I never really gave the gluten free version a chance...

I got really excited earlier this year when I saw this Paleo Mug Cake recipe over at The Wannabe Chef's site. It was grain free, and had the option to be sugar free to! So I tried it out. I loved it! And then...I kept making it. Over and over and over again!


I've adapted this recipe a bit to suit my preferences. Honestly, I never measure the ingredients I'm adding, just eyeball it. I have added chia seeds to give it a little more texture, and for some extra fiber and Omega 3's. My favorite mix-ins are chocolate chips and/or nuts (walnuts or pecans work great). I also enjoy topping it off with a little something extra once it's made. Try an extra tablespoon of peanut/almond butter (let it melt on the hot cake). Or a dab of cashew cream. Or your favorite fruit preserves. However, it really is amazing just by itself.

Topped with extra chocolate chips and walnuts.

Give this little treat a try next time you have a craving for something rich and chocolatey! I promise, you will quickly become addicted as well.


Paleo Chocolate Mug Cake
Gluten free, dairy free, sugar free, grain free/Paleo, can be nut free

Serves 1

1 small, ripe banana
2 Tbsp nut/seed butter
1 egg
1 tsp vanilla
5-10 drops stevia, or 1-2 tsp agave (optional)
2 Tbsp cocoa powder (I like a mix of regular and dark cocoa)
1 Tbsp chia seeds
Mix-ins: 1-2 Tbsp chocolate chips, chopped nuts, dried fruit (optional)
Topping: 1 Tbsp nut butter, jam, whipped cream/cashew cream (optional)

In a small bowl, mash banana with a fork until it is smooth. Add nut butter, and mash again. Then add the egg, vanilla, and sweetener. Mix again until everything is well blended. Add cocoa and chia seeds, and mix very slowly (cocoa can be messy if you try and mix it too fast). Then stir in any mix-ins.

Pour batter into a microwave safe dish or mug. Do not over-fill the container, because this cake will rise in the microwave.

Microwave on high for 2 - 2 1/2 minutes, or until center of cake looks set.

Enjoy!

Cake can be eaten hot or cold. Or for breakfast. Or however you want it ;)

Topped w/ homemade Oregon blackberry-raspberry jam from my dad and step-mom! Amazing!

Sunday, September 23, 2012

Chocolate Chip "Milkshake" (Green Smoothie)

Yup, this is the latest and greatest of my green smoothie experiments. I've been on something of a cashew milk kick lately, and for some reason all that creamy goodness has me craving milkshakes! This baby boy LOVES his milkshakes!

The other day, I was craving a chocolate milkshake, and then once I created it, I realized that what I really wanted was chocolate chip ice cream! So I took the smoothie a bit further...

I've played with this one a bit over the past few days, and have really come to enjoy it. Of course, I added the avocado and spinach to justify it as a "healthy" treat ;)

As with most of my smoothies, the measurements are more of approximations. Taste test as you go, and you'll come up with results that work for you.

A great tip I wish someone would have told me awhile back is to experiment slowly w/ avocados in sweets. I absolutely love avocados, and obviously I love dessert, but I jumped in too fast with trying them out together, and had a few bad experiences before I figured out that I liked to add avocado slowly. Here's my rule of thumb: Start w/ half of the amount of avocado called for in a recipe (unless it's the centerpiece ingredient), then taste and add a little more if you like it, and then a little more...and compensate if it becomes too strong (add more chocolate, sweetener, etc). I really don't want to actually be able to *taste* the avocado in my smoothie, but it does add to the texture. Plus, it's a fantastic, healthy fat!

Anyway, back to the recipe!


Chocolate Chip "Milkshake" Green Smoothie
Gluten free, dairy free, coconut free, can be nut free
Makes about 2 c (1 large serving)

1 banana, cut into chunks and frozen
1-2 tbsp almond butter, or other nut/seed butter
1/2 c cashew milk, or milk of choice
1 1/2 - 2 tbsp cocoa powder
1/2 - 1 c raw spinach
1/4 - 1/2 avocado
Additional sweetener, to taste (I have enjoyed a couple drops vanilla stevia, and a dollop of molasses the most)
A couple ice cubes
1 tbsp dairy free chocolate chips (I use Enjoy Life)

Blend all ingredients except ice and chocolate chips in a high-powered blender, until smooth. Taste, add additional sweetener, liquid, cocoa, as desired.

Add ice and chocolate chips. Blend again, until ice is incorporated. Serve and enjoy!


Saturday, September 15, 2012

Newest Dairy Free Obsession - Cashew Milk

I've mentioned in previous posts that going dairy free was just as hard for me, if not more difficult, than going gluten free. I miss all the smooth, creamy sauces, melty cheeses, and rich ice creams of my past. Unlike the plethora of easily replaceable gluten free foods that taste just as good as the "original," there seem to be few products that legitimately work as dairy free substitutes.

One dairy replacement product that I truly loved was coconut milk. Coconut milk is a very versatile substitute for many dairy-based products, such as cream and milk. It can be used in savory recipes as well as sweet. The best dairy free ice cream I have ever had was made with coconut milk. I also loved this lemon cream coffee cake, and made it several times. However, sadly, I developed an intolerance to coconut...so that had to go too :(

I've experimented heavily with using nuts as dairy replacements - from my favorite almond milk, to cream cheese substitutes. I have found that nuts work exceptionally well in many forms to create a pretty good milk or soft cheese sub.

Lately, I've been on a nut milk kick. Blame it on being pregnant, where I am consuming way more refined carbs than I'd normally eat. The only thing that seems to appeal to me first thing in the morning is cereal. Thank goodness for GF Rice Krispies and the GF Chex line! When I am ill-prepared, I'll grab a box of store-bought almond milk out of the pantry, and choke that down w/ my cereal. However, nothing beats the consistency and flavor of freshly-made nut milk.

Enter cashew milk.


This has become my go-to recipe for surviving the mornings. It's incredibly rich, it's creamy, and it can be sweetened if you want to have a glass with your favorite gluten free cookies! It works fabulously in smoothies, milkshakes, and ice cream.

Even better, unlike the process of making almond milk, there is no straining involved with cashews! Just run your high-powered blender long enough, and it will get the job done quick and easy! Note: If you don't have a high-powered blender, I would recommend soaking your cashews for at least an hour before processing them, to make them softer.

You can alternate between the sweetener of your choice. I have tried Elana's recipe w/ agave nectar, Gena's vanilla-tinted variation w/ soaked dates, and I've even experimented with adding stevia or a bit of molasses for the calcium benefit. All have turned out great, but I think the agave nectar might be my favorite.

The "recipe" for cashew milk is really quite simple. Give it a try sometime, and you'll see why I love this creamy dairy free drink!


Cashew Milk
Gluten free, dairy free, coconut free, grain free/Paleo

1 c cashews, soaked at least 1 hour
4-5 c filtered water
Sweetener of choice (agave nectar or a few dates soaked for 20 min), to taste
A pinch of salt, if desired
A splash of vanilla extract, if desired

Rinse cashews well after soaking. Combine with other ingredients in a high-powered blender. Blend for 2 minutes on high. Taste, and add additional sweetener if desired.

Serve chilled, and stir well before use. Stores well for 3-5 days.

Notes:

*Most of the recipes I've seen recommend soaking your cashews for 1-8 hours, but I've skipped this step numerous times, and still had success.

*You can also thin the milk out a bit more with an extra 1/2-1 c water, if you'd like to get more bang for your buck.

*One great tip for that last-minute cashew milk craving: Throw a couple ice cubes in with your serving of milk and blend. This will chill the milk enough to pour over cereal.

Friday, September 07, 2012

Chex on sale!!


Here's a sweet deal!! I just hit up our local Macey's grocery store and stocked up on their honey nut, cinnamon and corn chex. I paid $1.69 a box! This sale applies to every 4 boxes bought. Make sure you watch them apply the discount for each group of 4. I had to have them credit my card b/c they missed one :)

Thanks to Eating Gluten Free for sharing this!

For all those in the western US: If you live near an Associated Foods store (if a store near you sells Western Family brands, they are likely an Associated Foods store), head in to stock up on Chex cereals this week. The Associated stores near me (Macey's and Ridley's) are selling Corn, Rice, and Cinnamon Chex for $1.69 and $1.50 a box (respectively). Broulim's (in Idaho) is also selling Chex this week for $1.50 a box, so I think it's a system wide Associated Foods thing. It's a pretty good price for a great GF cereal, so I thought I'd let you know!


Think I got enough???